

Creating an Email Account
Step 1: Log In to the Enterprise Email Server
Log in to your Enterprise Email server using the administrator login details you received at the end of the server setup process.
Step 2: Open the Account Management Menu
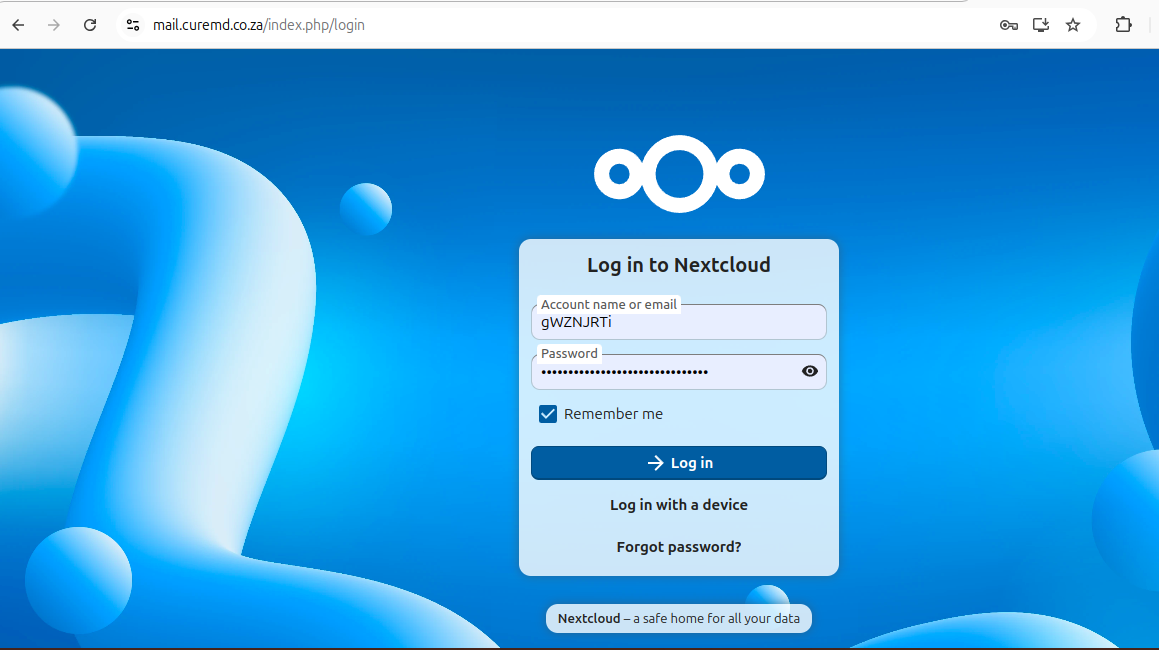
Once logged in, click on the letter/account icon in the top-right corner of the screen and click on Accounts.
Step 3: Create a Group (Required for the First Email Account)
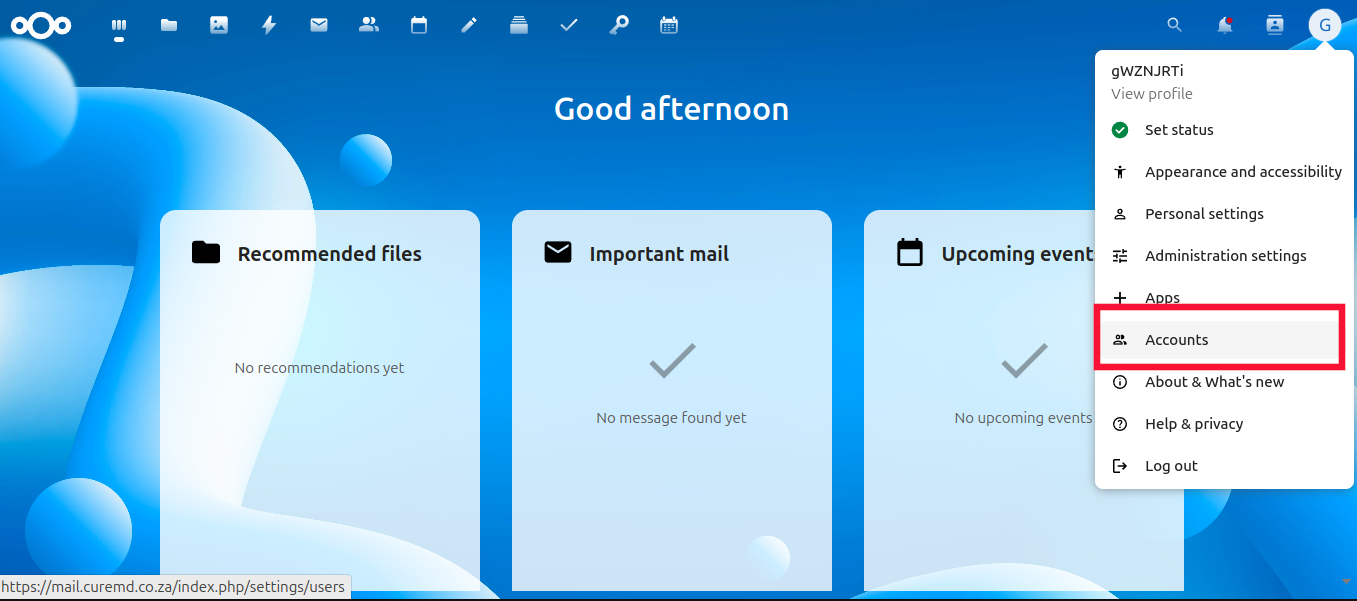
Before creating your first email account, you will need to create a group. A group is similar to a department or team within your company (for example, Sales, Support, or Accounts).
To create a group:
-
Click the + (plus) icon next to Groups.
-
Enter the Group Name.
-
Click on the Arrow to save the group.
Note: The default Admin group has full permissions, including the ability to create and delete accounts, manage groups, and perform other administrative tasks.
Step 4: Create a New Email Account
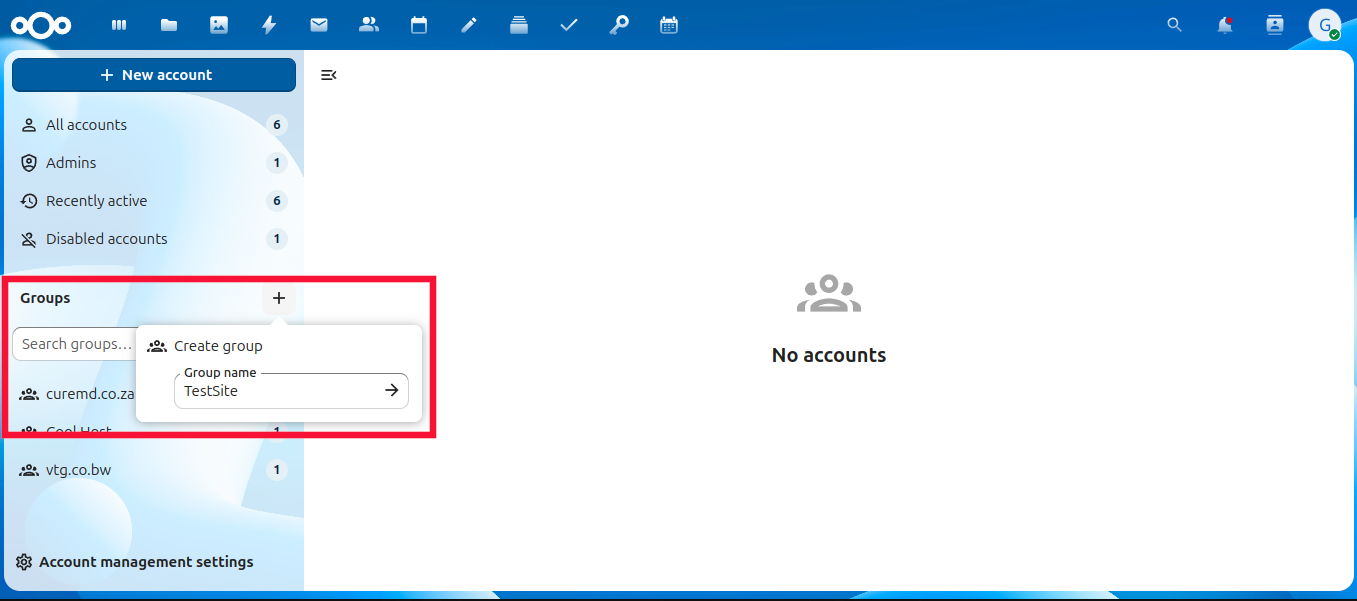
Click Add New Account and complete the fields below:
-
Account Name – Enter the full email address you want to create (for example, [email protected]).
-
Display Name – Enter the user's full name as you would like it to appear on outgoing emails.
-
Email Password – Create a password that will be used to access the email account.
-
Email – Enter the full email address again. This should be the same as the Account Name.
-
Member of the Following Group – Select the group (department or team) that the user belongs to.
-
Admin of the Following Group – Select this only if the user should be a group administrator.
-
Quota – Specify how much storage space you want to allocate to this email account.
-
Manager – Assign the user's manager if applicable.
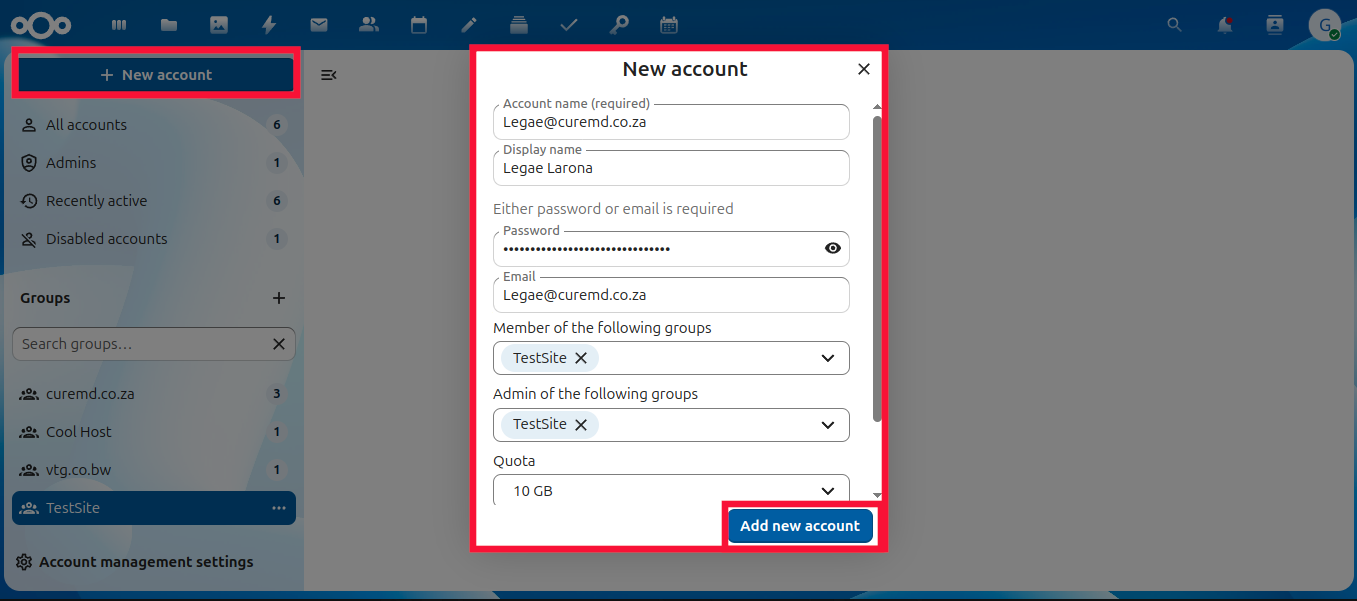
After completing all the required fields, click Add New Account to create the email account.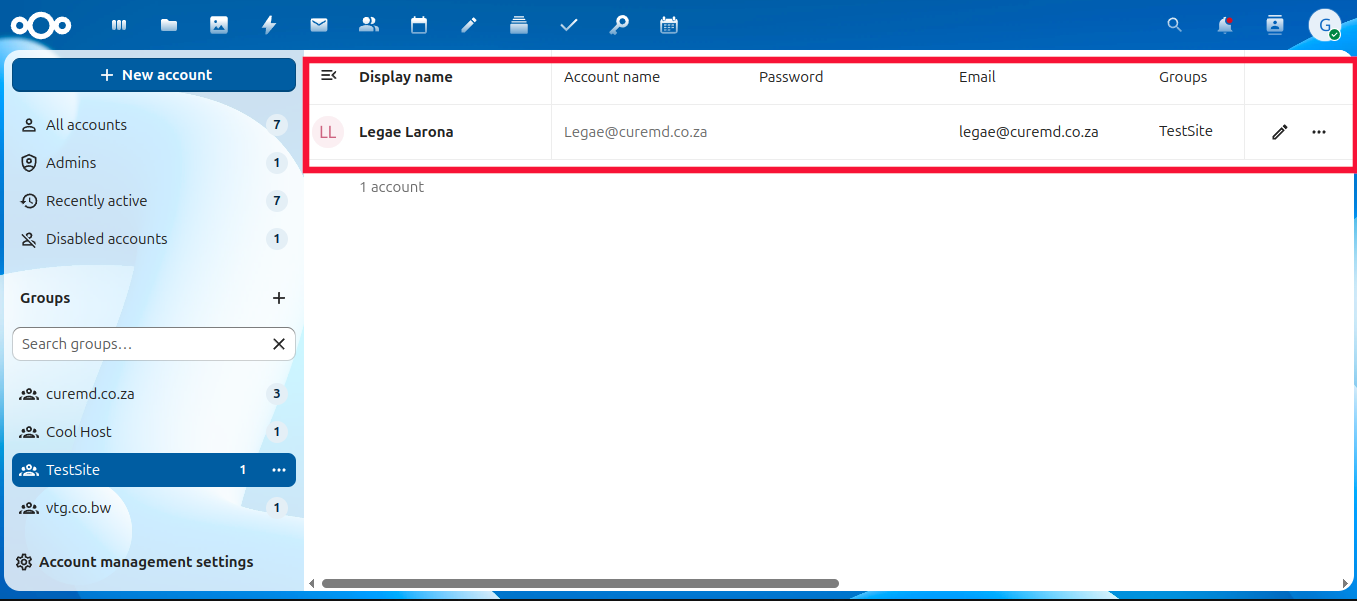
Setting Up the Email Account
Once the email account has been created, you can log in as the new user.
You have two options:
-
Log out of the administrator account and log in using the newly created email address and password.
-
Or open a new browser tab, visit inbox.yourdomain.com, and sign in using the new email address and password.
Step 1: Complete the Welcome Tour
After logging in for the first time, read through the introductory pop-up windows to familiarise yourself with the Nextcloud platform, then close the pop-ups.
Step 2: Configure the Email Account
Click Set Up Account.
You will be presented with two setup options:
Option 1: Automatic Setup (Recommended)
Use this option if:
-
Your domain is connected to a hosting control panel, and
-
The required autoconfiguration (XML) files have been installed on your hosting account.
Enter the following details:
-
Name: The user's display name.
-
Email: The email address you created.
-
Password: The password assigned to the email account.
Click Connect to complete the setup.
Option 2: Manual Setup
Use this option if:
-
You only have a domain, or
-
Your hosting control panel does not have the required autoconfiguration (XML) files installed.
Incoming Mail Server (IMAP)
-
Host: inbox.yourdomain.com
-
Port: 993
-
Security: SSL/TLS
-
Username: Your full email address (for example, [email protected])
-
Password: The password for the email account
Outgoing Mail Server (SMTP)
-
Host: inbox.yourdomain.com
-
Port: 25
-
Security: STARTTLS
-
Username: Your full email address (for example, [email protected])
-
Password: The password for the email account
Once all the details have been entered, save the configuration to complete the email setup.
